Tutorial
Introduction
With this tutorial, you'll get acquainted with FloydHub and learn the basics necessary to get up and running on the platform.
We'll start with an overview of FloydHub and then jump into training your first deep learning model on FloydHub using TensorFlow and the MNIST dataset (better known as the "Hello, world!" of data science). We'll be training a convolutional neural network (CNN) model to recognize hand-written digits using FloydHub's GPU servers. For more details on the data and the model, please refer to the TensorFlow documentation.
Quick Preparation Checklist
Create a New Project
First, we'll need to create a project. All the jobs we run while training our model will be grouped under this project, and we'll be able to go back and review each job later. For more information about projects, check out our Core Concepts page.
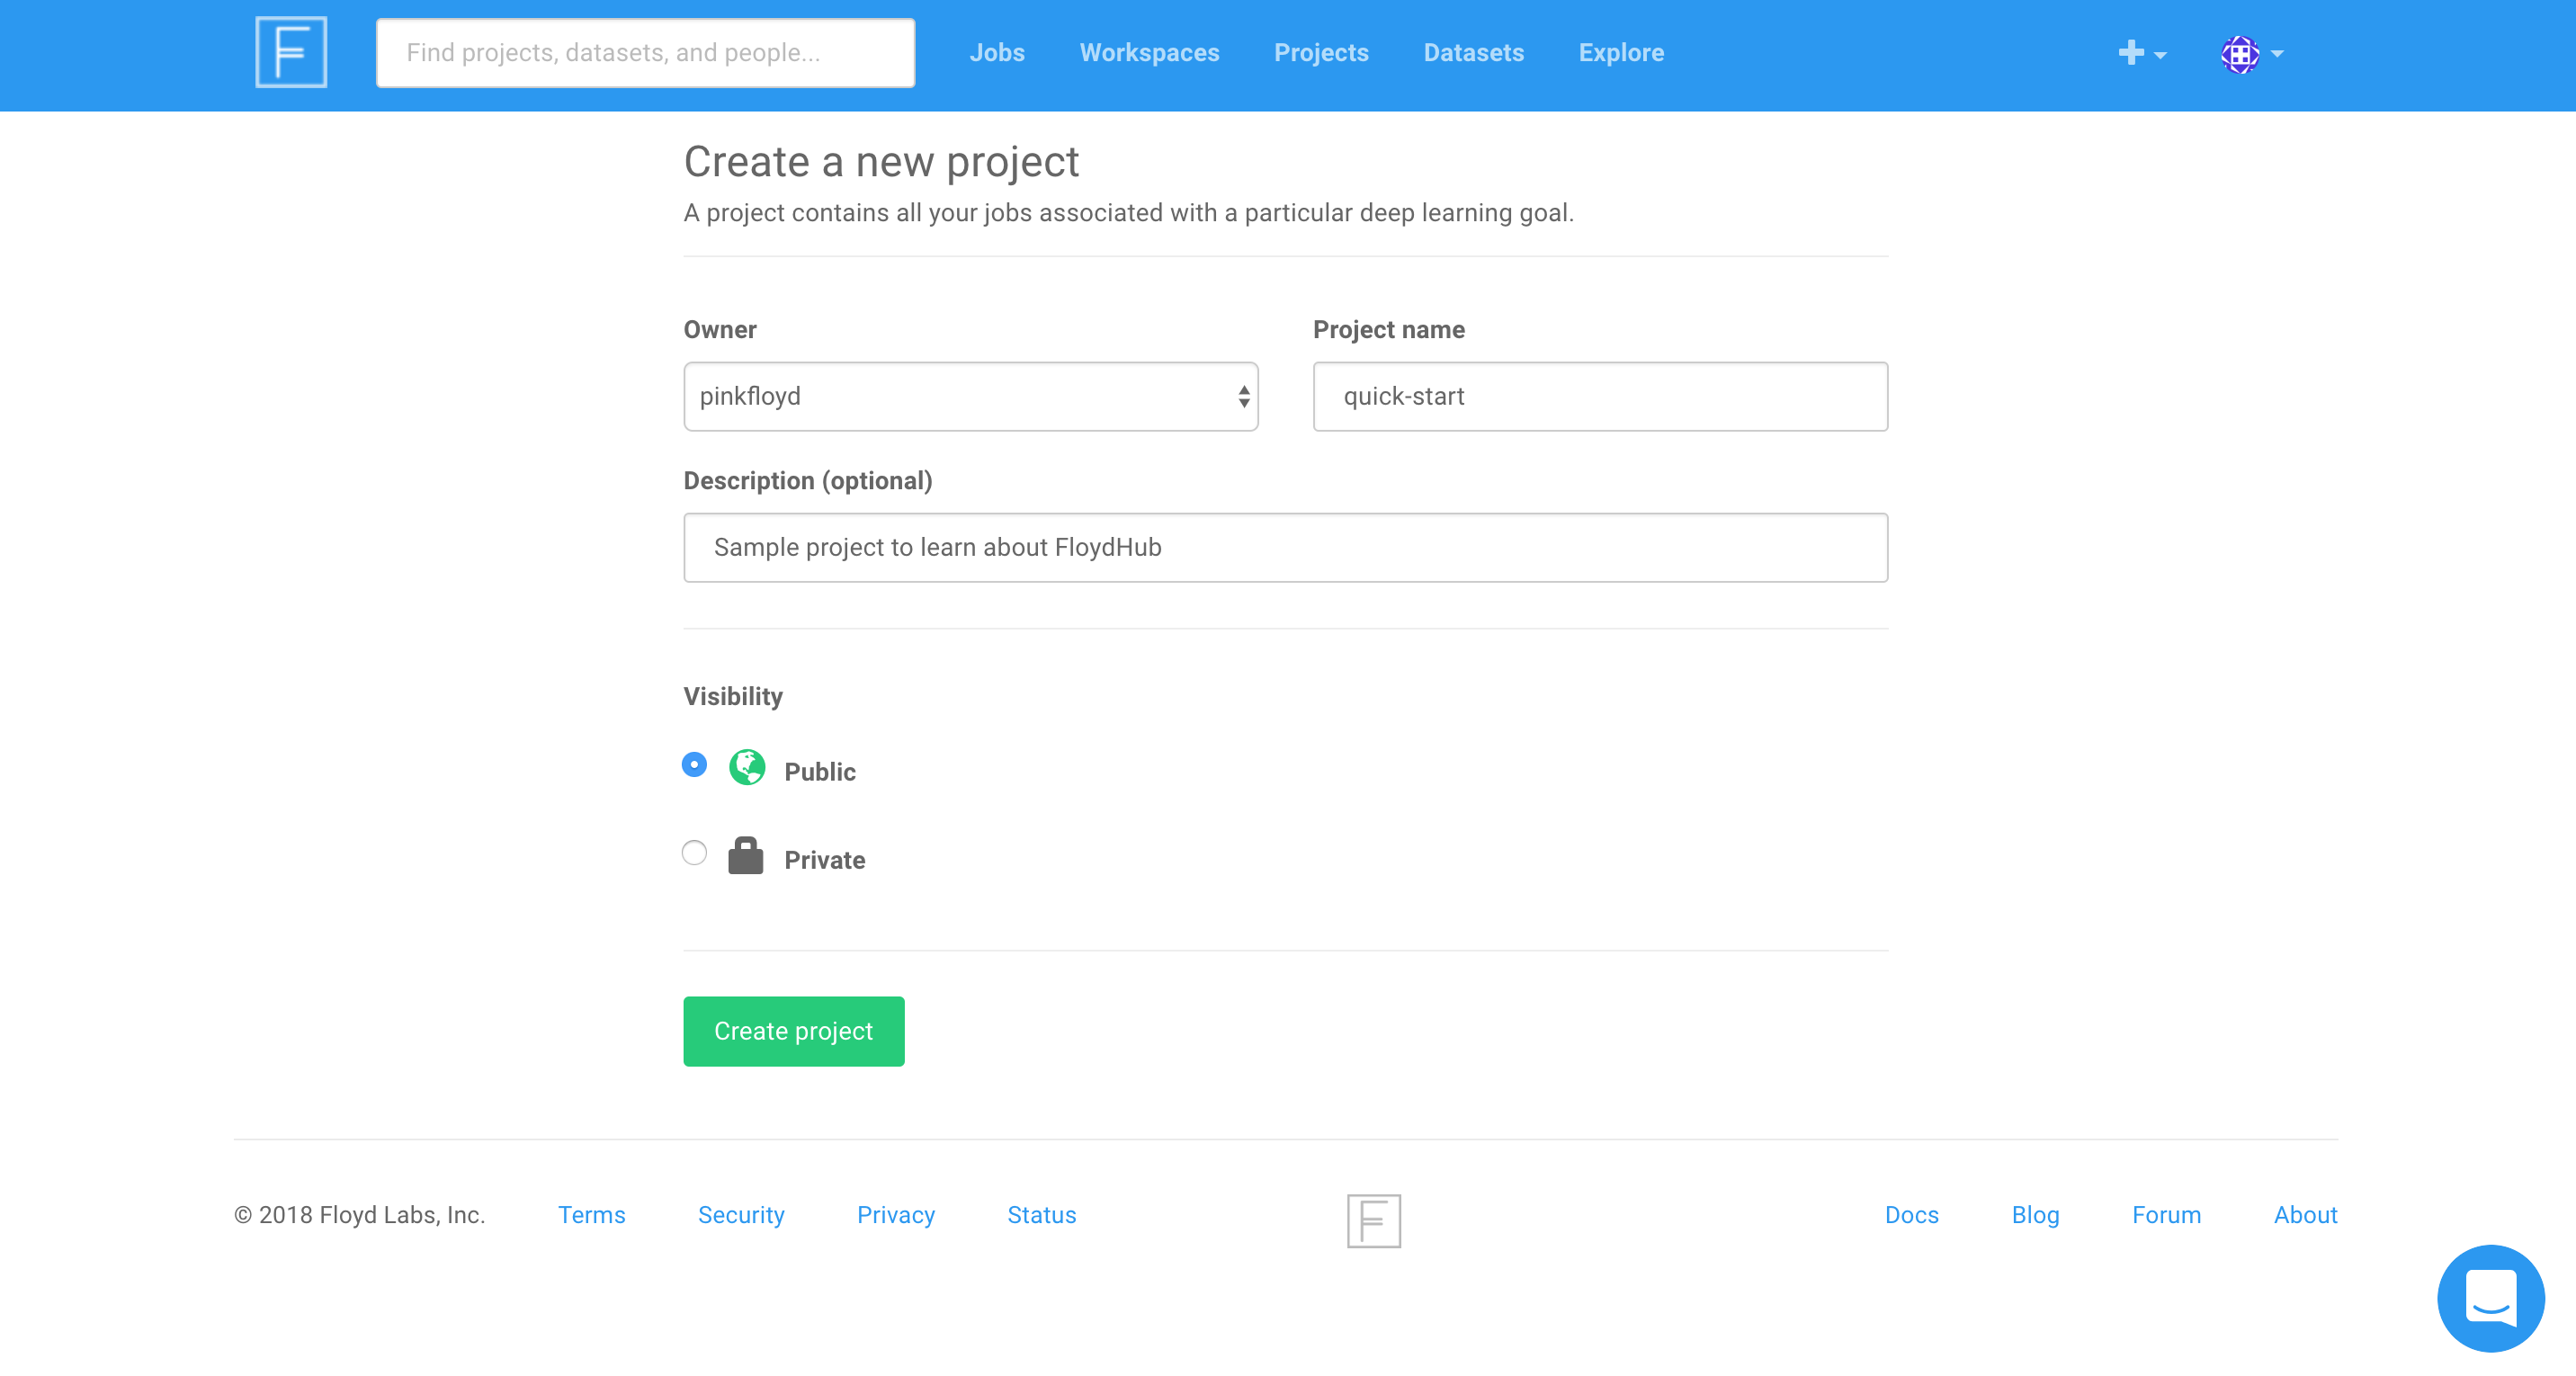
To create a new project project click the + button in the top bar on FloydHub
dashboard. Select New Project and complete the form to create a new project.
(Note that private projects are only available on our
Data Scientist Plans.)
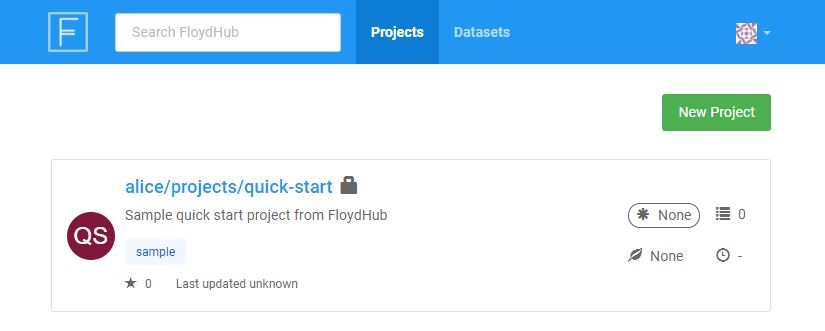
When you visit www.floydhub.com/projects you should see your quick-start project, as shown below:
Initialize the Project on Your Machine
Now that we've created the project on FloydHub, we can use Floyd CLI to start getting some deep learning done. We'll start by initializing our quick-start project on our local machine.
Clone the quick-start Repo from GitHub
If you were writing code from scratch, you would create a new directory on your computer and initialize the FloydHub project in there. In this quick start, we'll clone an existing GitHub repository and use its code. Clone the quick-start repository from GitHub onto your computer, and change directories into it:
$ git clone https://github.com/floydhub/quick-start.git
Cloning into 'quick-start'...
...
$ cd quick-start
$ ls
eval.py  LICENSE  mnist_cnn.ipynb  README.md  train_and_eval.py  train.py
This repository contains a file we'll use to get started: train.py.
It's a Python script that trains a convolutional neural network model against
the MNIST dataset. Feel free to look through the file if you'd like, but you
don't need to.
Initialize the Project Locally
To "initialize" a FloydHub project on your machine
means to run the floyd init <name_of_project> command in your project's
directory. This will create some files in the directory that Floyd CLI uses to
keep track of your jobs and sync with floydhub.com.
Let's initialize our project inside of the directory we just cloned from GitHub:
$ floyd init quick-start
Project "quick-start" initialized in the current directory
Get the Dataset
To run our deep-learning script, we'll need to give it access to the MNIST dataset. You probably know that the MNIST dataset is actually available within the TensorFlow package itself, but for the purposes of this tutorial we have separated out the dataset so you can get a feel for what it's like to work with datasets on FloydHub. We have the MNIST dataset pulicly available on FloydHub here.
Note
On FloydHub, datasets are kept separate from your project/code. This approach serves two main purposes:
- Upload data only once: Datasets are usually big, so we don't want to have to upload them each time we run our code.
- Enable collaboration: When datasets are kept separate from code, team members and communities can more easily work on projects together.
If you'd like more information on keeping data separate from code, check out this section of our Core Concepts page.
When you start working on your own projects, you'll eventually want to upload your own dataset. Check out this article to learn how to do that.
Running Your First Job
Now that we have our project created and our dataset ready, let's run our first
job and train our model! A job is an
execution of your code on FloydHub's deep-learning servers. To kick off a job,
we use the floyd run command.
Run the command below to kick off the training job. (Don't worry, we'll explain each piece of the command.)
$ floyd run \
--gpu \
--data mckay/datasets/mnist/1:mnist \
--env tensorflow-1.3 \
"python train.py"

Creating project run. Total upload size: 25.4KiB
Syncing code ...
[================================] 27316/27316 - 00:00:00

JOB NAME
----------------------
mckay/projects/quick-start/1

To view logs enter:
   floyd logs mckay/projects/quick-start/1
Congratulations! Your first job is now running on FloydHub's GPU servers. Behind the scenes, FloydHub does the following:
- Syncs your local code to FloydHub's servers
- Provisions a GPU instance on the cloud (because you set the
--gpuflag) - Sets up a deep learning environment with GPU drivers and TensorFlow 1.3
installed (because you set the enviroment flag to
--env tensorflow-1.3) - Executes the command
python train.pyinside this environment - Stores the output logs and generated output data
- Terminates the GPU instance once the command finishes execution
Here is quick explanation of each part of the command you just ran:
floyd run
Tells the CLI we want to run a job. You'll use this command to run all of your jobs. More info here.
--gpu
Specifies that we want our job run on a GPU server. More info on instance types here.
--data mckay/datasets/mnist/1:mnist
The train.py script expects the MNIST
data to be located at
/floyd/input/mnist or ../input/mnist on the computer where the script runs. We can use the --data flag to
ensure that our dataset is available to our code at /floyd/input/mnist.
We pass the --data flag the name of our dataset (mckay/datasets/mnist/1)
and the location on the server where we want our dataset to be available
(/floyd/input/mnist), separated by a colon (:).
Putting that all together, we get:
--data mckay/datasets/mnist/1:mnist
We have an entire article in our docs about mounting datasets to your jobs. When you're ready to dive in, take a read through it here
--env tensorflow-1.3
Ensures our job is run on a server that has TensorFlow 1.3 installed. More info on job environments here
"python train.py"
The command we want the server to execute to kick off our code. More info on how to specify commands here.
Monitoring Your Job
You can view the status of your job from your terminal using the
floyd status command. You can specify a single job
name (e.g. floyd status alice/quick-start/1) to get its status, or the
floyd-cli will show the status of all jobs in the current project.
$ floyd status
JOB NAME             CREATED        STATUS    DURATION(s)  INSTANCE    DESCRIPTION   METRICS
-------------------  ---------      --------  -----------  ---------   -----------   --------
alice/quick-start:1  just now       running            15  gpu
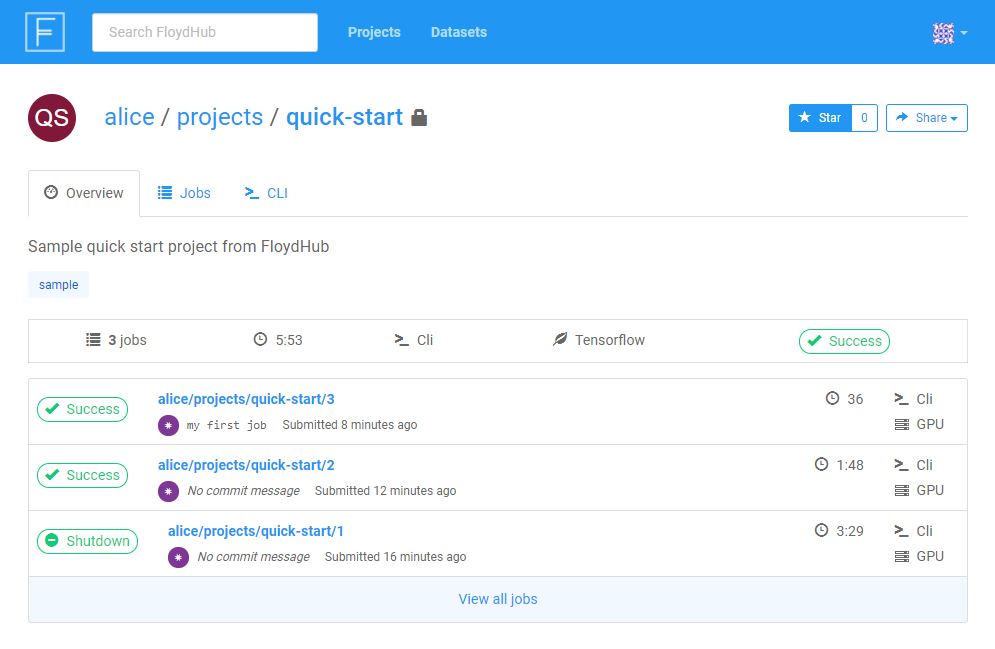
You can also view the status of your job in your browser by visiting the JobURL printed by the floyd run command. For example,
https://www.floydhub.com/alice/quick-start/1. The page should look something
like this:
Viewing Your Job's Logs
It's easy to view the logs generated by the job from your terminal with the floyd logs command. If you don't specify the job name, the most recent job of your current project is used.
$ floyd logs -t
...
2017-07-12 16:00:07,446 INFO - Starting attempt 1 at 2017-07-12 16:00:07.436349
2017-07-12 16:00:09,088 INFO - Starting container...
2017-07-12 16:00:09,297 INFO -
...
##############################################################################
2017-07-12 16:00:09,297 INFO - Run Output:
2017-07-12 16:01:46,154 INFO - Successfully downloaded train-images-idx3-ubyte.gz 9912422 bytes.
2017-07-12 16:01:46,158 INFO - Iter 1280, Minibatch Loss= 39855.289062, Training Accuracy= 0.17969
2017-07-12 16:01:46,159 INFO - Iter 2560, Minibatch Loss= 14964.132812, Training Accuracy= 0.42969
...
##############################################################################
...
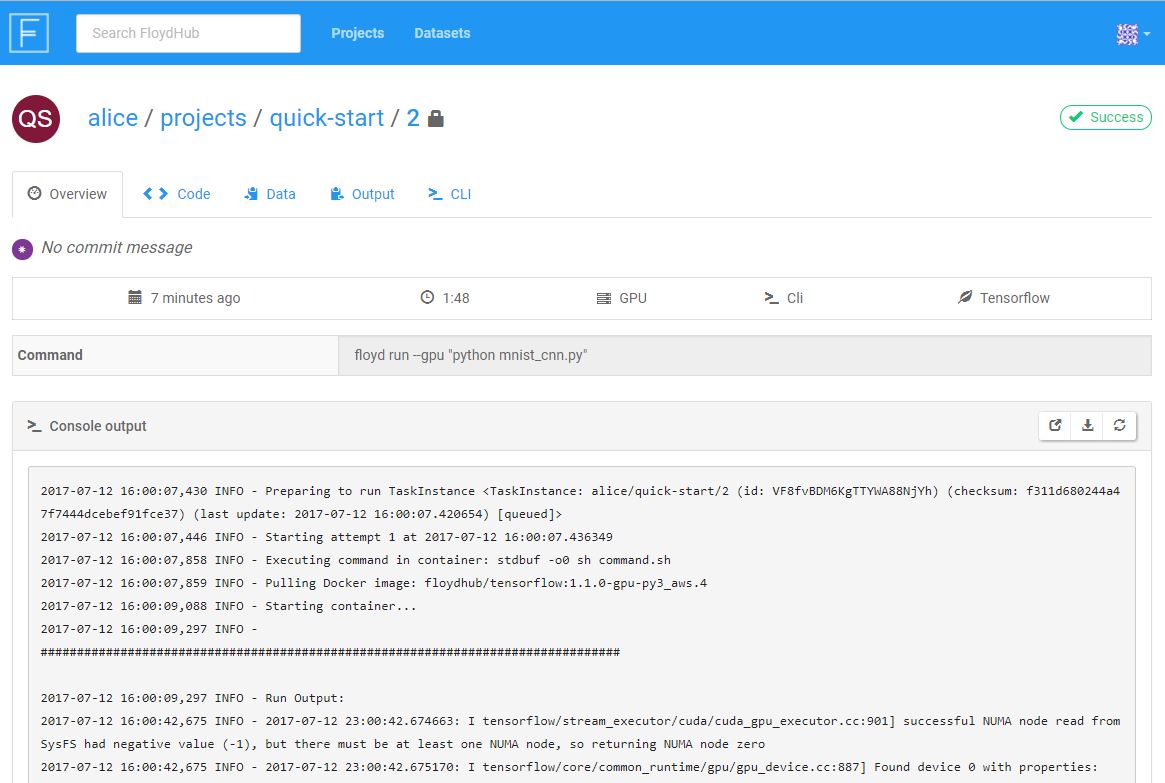
The output of your code is printed in the Run Output section of the logs,
between the ######### lines. Anything you log or print in your code will
appear here, so this is a great way to monitor the progress of your model
training command. In our quick-start project, we're logging the training
accuracy of our model.
Using the -t (tail) flag will stream the logs as they are generated.
You can also view the logs in your browser using your Job URL. (The Job URL
will look something like
https://www.floydhub.com/<username>/projects/quick-start/<job_number>.)
Storing Your Model for Future Use
We want to save the model we trained so we can use it later, maybe to iterate on it or to check its accuracy using an evaluation script.
To save something during our job that we want to save for later, we just need to make sure it gets saved in the current working directory during our job. Anything in this directory at the end of a job will be saved for us and we can reuse it later. Take a
look at line
108 of our
train.py script. Here's the line:
builder = tf.saved_model.builder.SavedModelBuilder("cnn_model")
For more details on how to save and reuse job output, see this article.
Now let's evaluate our model by checking it against our evaluation script.
Evaluate Your Model
To finish off this tutorial, we'll evaluate the model we trained in our first
job. The repository we cloned early has a script we can use to do this:
eval.py.
The script expects our model to be located at /model on the machine where the
script runs. Somehow we've got to make sure that the model we saved in our
first job ends up at that location during our second job. FloydHub allows us to
reuse a job's output in another job, and to specify the place the data will be
located during the second job. The method to accomplish this is the same one we
used to mount our dataset to our first job. We'll demonstrate how to mount our
model in the next section.
How to Reuse the Output of Your Previous Job
Output from previous jobs can be attached to a new job using the same approach
as mounting a dataset. We just use the name of the output instead of the name
of a dataset when we use the --data flag:
--data mckay/projects/quick-start/1:model
Notice that we specify /model as the mountpoint because we know our
evaluation script expects our model to be at /model.
For more information on reusing output, check out this article
Run Your Second Job
Follow this command to run your second job. Note that we are mounting our
dataset again at /floyd/input/mnist and also mounting our model at
/floyd/input/model. Be sure to replace mckay/projects/quick-start/1/
with the name of the output you want to mount (something like
<username>/projects/quick-start/<run_number>/)
$ floyd run \
--gpu \
--env tensorflow-1.3 \
--data mckay/datasets/mnist/1:mnist \
--data mckay/projects/quick-start/1/:model \
'python eval.py'

Creating project run. Total upload size: 26.3KiB
Syncing code ...
[================================] 28620/28620 - 00:00:01

JOB NAME
---------------------------
mckay/projects/quick-start/2

To view logs enter:
   floyd logs mckay/projects/quick-start/2
You know how to check the logs, so go ahead and check the logs of your second job and see how accurate your model is!
If you forgot how to check the logs, take a look at this section of the page.
Iterating on Your Model
Congratulations! You've trained and tested your first model on FloydHub 🎉
At this point, you can edit your Python code locally to make improvements or
adjustments to your training script, and then kick off a new job with the
floyd run command. The floyd-cli will upload the newest
versions of your code and submit another job to the FloydHub servers. Along the
way, FloydHub will be managing and tracking of all the iterations of jobs
within your project.
You can always view details on all of the jobs in your current project with the
floyd status command from your terminal, or by visiting the Project URL in
your browser.
Example: www.floydhub.com/mckay/quick-start